Monday, 3 May 2010

Modelling The Egg

I was now ready to make some of the extra models that would be needed to complete the animation. These were models that would not need animation but were going to be created in 3d because it made them look realistic and fit in well.

The first model to create was "The Golden Egg". Seeing as the whole fable is based around this Golden Egg, it was obviously pretty important. I started off by creating a "Sphere". I then made this an Editable Poly so that I could play around wit the vertices. I now selected the very top vertex of the Sphere and used the "Soft Selection" tool to gradually start affecting a larger area of the sphere. I then used the move tool and raise the height of the egg. This created the shape of the top of the egg.

As you can tell, this is a very simple model to create but it was very important to the fable so needed to be created.


I now had my Egg model created however one of the key parts of the Fable is the fact that it is golden. This meant that I was going to have to change the colour of the Egg. I thought I would look around on the Internet to find a good gold texture but instead found a tutorial of how to make one.

http://www.3dvalley.com/tutorials/creating-gold-silver-and-copper-materials << The link for the tutorial I used.

This tutorial showed me how to create the gold texture and add different lighting to it to give it a good shine.


I liked the final product however during the animation I did come across a big problem whilst using this egg model. With the gold texture that I had created attached to it, adding lighting to the scenes made it very hard because of the reflection that was set up. In most of my scenes I ended up having to just add a gold colour created from the colour swatches in 3ds max.

Monday, 26 April 2010

Bipedding My Models

I now had my main two models created and had put materials on them. The next step was to create the Biped's to fit them so that they could be animated.


The first step was to ceate the biped for the Goose. I thought this would be harder to create as it is a more irregular shape as oppose to the Farmer, which resembles the basic biped shape.

The first thing I needed to do was take off the "Arms" of the biped as the goose only has two legs. I then increased the amount of "Neck links". This was to enable me more movability in the neck, which is the main part of the Goose that would be moving. I also added some more "Tail" links to enable me to move around the Tail Feathers of the Goose. I am not sure how much animation will be done with the feathers but I thought they could possibly be used to make the animation look better. The final change I made was to the feet where I added three toes as that is how I had made my Goose.

I then created the Biped with the adjustments made and re-sized, moved and scaled it to fit the body of the Goose. This would obviously have to be adjusted as different parts were moved. I started with the head and the neck and got them placed how I wanted as shown below.


I then worked on getting the "Tail Links" into place. This would enable me to animate the "Tail Feathers" when it came to actually completing the animation. I did this by "Scaling" the links to make them longer.


I then worked on the legs. Scaling, rotating and moving them to make them fit inside the mesh.


The Goose Feet - Edited the toes by rotating and scaling to make them fit the toes.

One problem that did occur was trying to make sure all the biped fitted into the mesh. The angles of the legs coming off the hips made this very difficult. After speaking to other classmates and the lecturer I was shown an option to solve this. In the object properties of the model there is a tick box for "Renderable". If this is unticked the biped does not actually come through the mesh on the render's but still has the correct animating affect.

This is not recommended on a large scale but I was only using it for very small amounts of the biped that were coming through.


I then started work on the Biped for the Farmer. This was a lot easier as I used the basic biped model for a human. I then just had to move,scale and rotate some of the bones to make them fit.

The Farmer Biped


I did the same for farmer's hand that I had done for Toes of the Goose. I extruded the fingers and rotated them to fit into the mesh of the hand and fingers.


Farmers Hat + Eyes

Apologies but i forgot to post this before my post about the Materials. After creating my farmer, I needed to add Eyes to his head. TO do this I created 2 Circles and converted them to Editable Poly's. I then selected all the vertices of them and used the "Attach" tool to attach them to the head of my farmer. I repeated this process for the other eye and Mouth.

I also decided to add a hat onto my farmer. This was very simple to make but I feel makes the farmer look a lot more realistic. I started off by creating a cylinder. I decided on the height of the cylinder to decide the thickness of the hat. I then increased the amount of "Width Segments", which created a cylindrical effect coming out from the centre of the circle. I then chose the inner cirlec of the hat and move it upwards to create the room for the head.

I then selected the centre vertex and used "Soft-Selection" to gradully increase the selected area. I indented this area to make it look more like a hat. I also moved the vertices around the edge of the hat to give them a bit of an upwards curve.

Materials

I now had my 2 main models made. These were the models that were goign to feature thorughout the animation so were therefore most important. I now needed to put some colour to them because at the moment they just looked plain.

The main tool I used for this process was the ability to "Set and Select ID's" for individual or groups of Polygons. This meant that I was able to select a group of Polygons and then give them all the same material. It is a great way of saving time ratehr than adding it to each Polygon


I started off by working on the Farmer.

The Farmer - For some reason the eyes come up black on this image however you can see them properly in the final render below.


The Farmers Shoes and Legs.


The Farmers Belt - I added a leather material to the belt however it does not appear in this screenshot. It appears properly in the final render below.


The Farmers Belt - I created this affect by getting an image of some "Leather" from the Internet. I then added the leather material to the belt.

Final Render of the Farmer - The leather material of the belt and the Eyes are both now properly viewed.

I then moved onto the Goose.


Side View of Goose


Tail Feathers of Goose


Beak and Eye of Goose


Final Render Of Goose


Friday, 19 March 2010

Models So Far - Goose

The second model that I had to make was going to be a Goose. The Goose is the most important part of the story so I wanted to make sure that it looked as good as I could make it. Similarly to the farmer I wanted to create the goose in a cartoony manor. Again just like the farmer there is a lot more work to be done on the goose but I wanted to share my current progress

This is the model that I have. As i said, there is more work to be done but i was very happy with the overall outcome.


I started off with a simple box to model the body of the goose. In the same way as the farmer I was not sure how many polygons I would need so I tried to keep it low and add them if needed later.
I cut the box in half and started to work on the corners. This was to give shape to the goose's body.

I added a Symmetry modifier and added Turbosmooth to see how it looked.


I edited the front and back ends of the body to make them angle in like a Goose's body does.


Once I had the body sorted I wanted to make the tail and feathers for the back end of the goose. I started by extruding one of the poly's off the center of the back end of the body. I moved the vertices around so that they could be shaped into a tail.


I shaped the tail into feathers and put the Turbosmooth on. I felt the feathers did not stand out enough so wanted to edit them.


I extruded the feathers so that they stood out more.


The feathers with Turbosmooth on.


I manouvered some of the vertices and used the extrude tool to create the connection between the body and the legs.


I then extruding the polygon downwards to create the legs.


After completing the legs i then modelled the feet. This was done by extruding the bottom of the leg and forwards. I then moved the vertices and extrude tools to create the feet into a webbed foot like a Goose's. I then placed the symmetry tool on so that both legs were created.


The next step was to create the neck and head. I started to do this by extruding one of the polygons out. I repeated this a few times to create some vertices for me to edit the angle and shape of the neck. I did this to make it look more like a neck.

After the neck was created i extruded the polygons and made a head shape. The head was made by extruding the polygons a few times and then moving the vertices around. This allowed me to create the shape I wanted. Off of this head I extruded the polgons and used the Chamfer tool to create the beak. I moved the vertices around to create a sharp shaped beak just like a goose has.


Goose Model without Turbosmooth.


Goose Model with Turbosmooth.

Models So Far - Farmer

The first model that I have started working on is the farmer. As mentioned in previous posts I have decided that the animation is going to be quite cartoony. One of the reasons for this is that I have struggled in the past with the "modelling" side of things so think I might be able to gain more marks from focussing on the animation.

The Farmer isn't finished yet but I have it at a stage where I am quite happy with how it is and thought i'd share my progress with everybody.


This is where my farmer is at, it has arms, legs, fingers and a head, which are the key features that would need to be made on the model. I have taken a number of screenshots to show the progression of the model

I started the model with a simple box that would be the main body. I was not too sure how many polys / sections would be needed so I kept them to a small amount at the start. I could always add more if i found it was necessary.

From previous experiance of working with models, I have discovered that it is a very good method even if only for myself to use the "Symmetry" modifier. To use this the model has to be cut in half and then this modifier added. it gives the view of how the model would look if there was a line of symmetry down the middle. When it comes to it I can then put the model back together. In a way it makes the worktime half as long. This is only really beneficial if both sides are going to look the same.

I used the symmetry tool on the basic box and then started to make it look more like a body. To do this I moved some of the vertices to give a more rounded body. This gives the body a bit more definition with the idea of a waist and hips. I then extruded 2 of the bottom polygons out to make the legs. The length of the legs can always be edited later on to fit in more with the shape.

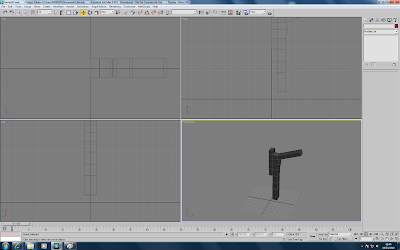
The next step was to extrude the arms out. This was done in the same that the legs were.

I then moved onto the feet. This was done in a similar way to the arms where i extruded out the polys to make a foot shape.

The next step was going to be making the fingers. From looking at other peoples blogs I had the feeling that this was going to be very tough. I thought about how the fingers of the farmer would be used in my animation and realised that they would never be solely focussed on. This made me feel better as I felt it was not necessary to have them looking perfect. I was quite happy with how my fingers finished looking as I know the trouble they have caused other people.

To create the fingers i cut into the end poly of the arm and then extruded the newly created Poly inwards. This created the effect of the gap between a person's fingers whilst the skin is still attached.

Fingers with Turbosmooth off

Fingers with Turbosmooth on.

I wanted to give the fingers a bit more definition as currently they were all pretty much the same length and shape. As already mentioned I was not too focussed on geting them to look perfect but wanted a realistic look. I stretched out the middle finger and moved the fingers about a bit to look more like a human hand.

The final step was to create the head. With symmetry on I extruded the neck polygons a few times upwards. I then took the extruded polys and moved the vertices into a more rounded head shape. This will need some more work done to it to give more definition of the face and facial features but I will come back to that at a later point.


Moodboard

I decided to create a moodboard to get an idea of what my models could look like. I have already decided that I want to make the animation very "cartoony" but it is important and useful to get an idea of what more of the realistic models also look like. I gathered a range of images to prepare for the actual making of the models and placed them into a moodboard.